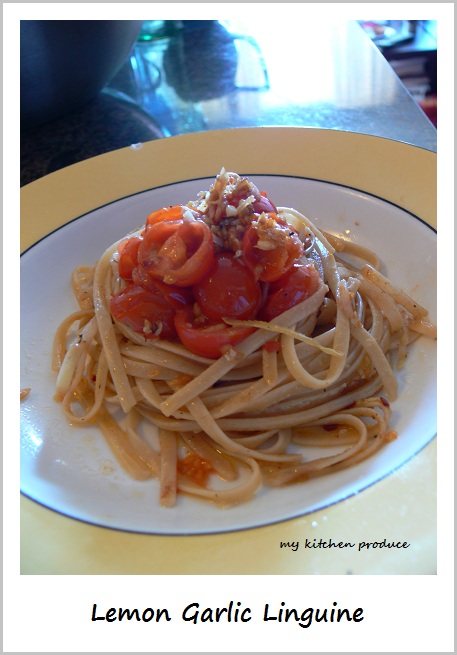
What can I say about this simple linguine. It tasted simple, refreshing, fulfilling and healthy. I love the lemon zest flavour. Remember not to squeeze too much lemon because those lemon could taste really sour. My another suggestion is to add a small can of tuna. They could add much flavour and fill you up.
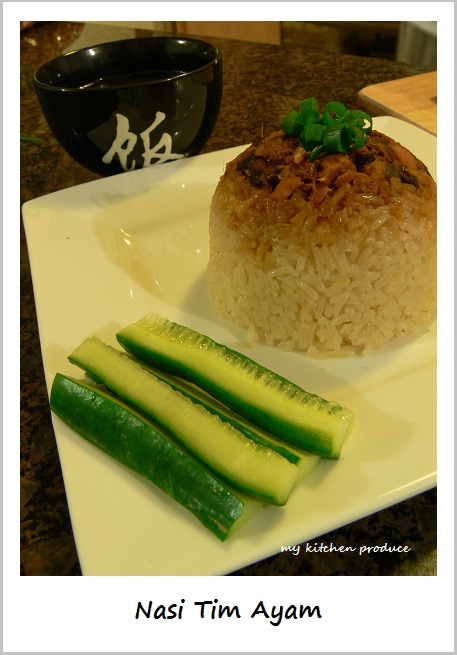
This is one of Indonesian Chinese culinary dish as far as I know (anyone knows what the story behind this dish, please feel free to comment). Literally, “Nasi” means rice, “Tim” means steam, “Ayam” means chicken. I have never been a big fan of this dish and never taste it. It is not that I don’t want to try them but there are too many appetizing dishes in Indonesia that I crave that this is never be one of them. I became aware of its existence because my sister in law fond them so much.
Anyway, why did I make this this? Simple. A different menu variety for my toddler and family. Because I never make them before, I started to surf the web finding out how others make them. It turned out that people making them in few different ways. Some actually did as mine, however they didn’t steam them again before serving. Some put the sweet soy chicken in a bowl together with an uncooked rice and chicken stock, then steam them. I found the second way quite tricky, because there are lots of rice variety so that you can’t really follow others recipe in terms of chicken stock amount to cook the rice. So, I just did them my way and wouldn’t be bothered as long as it looks like how it is supposed to be and tastes great or at least eatable.
Before you start, here are few tips that might help:
- The longer you simmer the soup, the nicer and deeper the soup taste. So I suggest that you to prepare them ahead of time.
- When you wash the rice, drain them thoroughly so that when you sauteed them with garlic and ginger, they really could absorb the fragrant of the spices.
- Do not peek while the rice is cooking, at least not before 15 minutes, so that the rice could cook evenly.
- Taste the rice after cook, they should have rich taste and slight saltiness on them. Not salty but you could taste the salt, if you understand what I mean. If you find that you can not taste the saltiness, add some fish sauce to the rice and stir until well combined.
- Press the rice into the bowl, so that after steaming you could have the nice bowl shape rice like mine.
- Sometimes it is hard to take the rice out of the bowl after steaming. Just place them up side down on the plate and let the bowl cool off slightly. Or you could try pushing the rice on one side using the back of the spoon, and gently squeeze them out.
read more…
It has been a long time due for me to try Paula Deen’s fried chicken recipe. I watched her on OPRAH years ago telling her stories of success doing her cooking business. If I am not mistaken she also cooked few dishes including the fried chicken, however I am not sure whether this Southern Fried Chicken was one of them. Anyway, this is one of her great recipe. Easy and quick to make and everyone craves its crunchiness, after all they are deep fried ![]()
Anyway before you start, I have few tips of my own:
- I almost ruined the dinner by not reading the recipe properly. I doubted my self for a while looking at 1 cup of salt as House Seasoning to mix to the chicken pieces. Instead I put 3 tsp of salt and it was so salty (I test fried them) that I had to cut another whole chicken in the fridge (Thank God I had another whole chicken stored, but it was for Hainanese Chicken). So my point is to read to your recipe properly (*-*)
- Try to trim the fat as much as you could, so you will feel less guilty. I think it tastes much better.
- Mix 2 eggs first with the hot sauce, ans add another one if you really need it. As I only needs 4 eggs for 2 whole chickens.
- Same as the eggs, just use your flour half the recommended portion and add more if you need more.
- If you have the leftover chickens and they went cold, heat them again in the oven. All of the oil came from chicken fats and oils will be released and your chicken will taste crunchy and crispy again, with less fat of course.
read more…
The price of banana in the supermarket has been crazy lately. Could you imagine $4.95 – @5.95/kg? I am better of having a luxury of eating Kensington Pride Mangoes at $19.99/box. So, you are wondering what in the world was I thinking to make a banana cake. This was how it all begins. I went to Harris Farm to buy a box of Mangoes, passed by banana stand and wasn’t intended to buy any of them. Then I passed by discounted stand where they have buckets of over ripe fruits, and there they were… bananas. A small bucket full of bananas for $2.95. I got 5 bananas on my bucket. Yipeee.. it’s banana cake time.
My husband ordered me this great book from Amazon called “Baking: From My Home to Yours” by Dorie Greenspan that I have been longing to have. When a delivery guy ringed me through my unit phone telling that he was downstairs, I just rushed through the lift carrying my 2 years old toddler. I was so excited receiving this book that I can’t wait to try her recipe. This banana cake is one of her great collection that she got from her friend Ellen Einstein who owns Sweet Sixteenth Bakery in Nashville.
Anyway, my tips before you bake this banana cake are:
- Wait until the bananas are very ripe. When they are ripe, store them in the refrigerator until their skins are blackened. I know it is disgusting to see the blackened banana’s skins, but to tell you the truth, the banana cake taste even better and sweeter. Because they are sweeter, I don’t need to use so much sugar. If you are following my sugar quantity, just keep in mind though that I don’t have a sweet tooth, so you might add more from my recommendation (the one highlighted in red).
- If the top of the cake browns too quickly, place an aluminium foil on top of the cake.
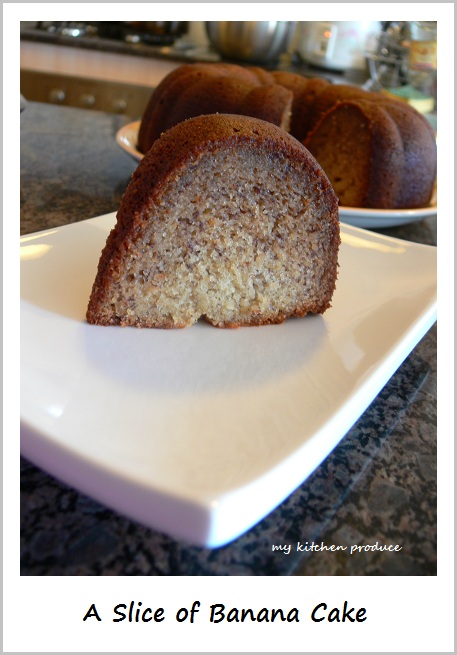
This is how my banana cake looks like straight from the oven. Why the top cracks? I have no idea. But it tastes so goooooood and fluffy and yummy. I never taste the banana cake this good. This is definitely a winner recipe of banana cake for me.
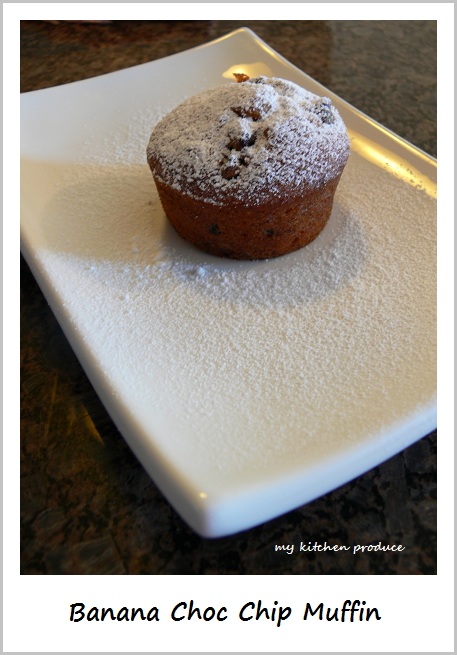
I had some left over batter that I turned into muffins. I added some dark choc chips to the batter before baking them. For me, they are too sweet. Next time, I will decrease the amount of sugar if I want to turn them into choc chip muffins.
read more…
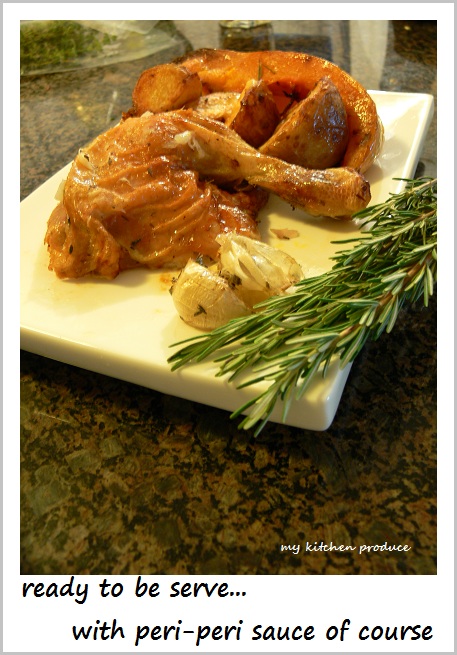
It has been a long time that I said to myself that I have to start searching for a genuine home-made roast chicken recipe since my husband seems to have a love affair with those Coles roast chickens. He keeps buying them once a week, and sometime he bought two roast chickens at once and told me that he would bring some of those to work for his lunch. So now it is time get revenge to those roast chicken and make him fall in love with my roast chicken (*-* reads wink).
I bumped into Jamie Oliver recipe few days ago, and decided to give it a go since he have so many great reviews. To find out the recipes, click here.
These are few things that I did, I hope they are helping:
- When he says rub a generous amount of salt all over the chicken, in and out. He really means GENEROUS amount. I don’t think my amount is generous enough as I couldn’t really taste the saltiness. I should just rub the sea salt all over its body instead of cracking the sea salt over the chicken.
- I didn’t leave the chicken long enough in the fridge so I guess they are not really marinated with the salt and the salt is not absorbed thoroughly into the meat. I only left them in the fridge for about 30 minutes, because I was waiting for my brother coming back from buying lemon.
- The recipe states that the potatoes skin has to be peeled. I didn’t peel the potato skin because I was worried that boiling them for 12 minutes would make them well done and thus turn them into mash potato. However today (few days after I made them), I find out that you actually have to peel the potato skin and boil them for about 5 minutes (not 12 minutes, or probably it is depend of what potatoes you are using).
- My steam potatoes couldn’t get chuffed up and fluffy when they were toasted on the pan, and they didn’t turn crispy when roasted. I probably really need to peel those skin

- I tossed butternut pumpkin in the pan with some fresh crack sea salt and olive oil for about 10 minutes. Then I placed them together with potatoes in the roasting pan (the last 45 minutes of cooking process).
- A handful of thyme was a bit too much for me. The smell of the herb was so strong that I felt like smelling a menthol balm.
- The roasted garlic was so good.
- The overall recipe is great and easy to follow.
So, here are some pictures of my roasted chicken fresh from the oven. The above picture was taken using a table lamp, and the below picture was simply on the manual mode. They should look better when are taken on daytime, but what can I say it was our dinner.
Please leave your comment/suggestion if you find this recipe useful. Can’t wait to hear from you and Thank You!!!
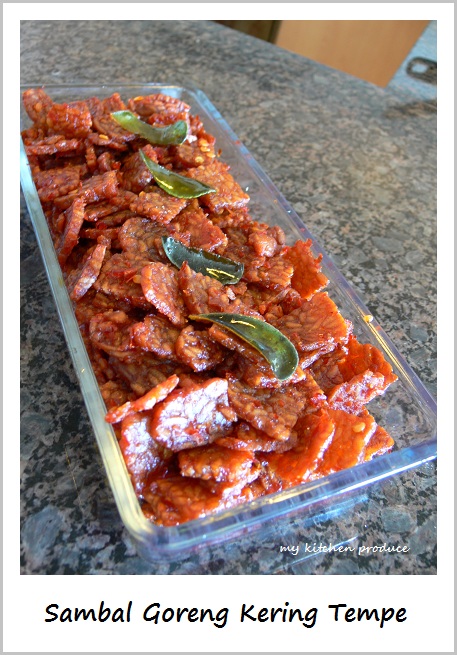
This is another complimentary dish for Nasi Tumpeng/Kuning (will post Nasi Kuning recipe as soon as I have time to style their presentation). There are few things that I left out in making this dish, such as fried peanut, fried potato chips, and fried white bait (Indonesian calls them ikan teri, and Malaysian calls them ikan bilis). Anyway, either of the combination will do, as I did only fried peanut and white bait for my son’s birthday party.
Tempe is now widely available in groceries stores like Coles and Woolworths. They are great for vegetarian as they are high in protein. However, I am using the plain natural tempe product bought in Asian/Indonesian groceries, as the types of tempe sold in Coles and Woolworths has been either marinated or flavoured. Or at least I think they are, as they have a black brownish fluid on them. To find out more about tempe, click here.
Few tips before you start cooking them:
- Make sure to slice the tempe thinly and deep fried them until crispy. Mine was a bit to thick because I was worried that they would be too fragile to be handle.
- When cooking the chilli mixture, watch the bubbles appeared on the oil, when they start to decrease and almost stop bubbling, then it is time to put salt, vinegar, tomato sauce. According to my mom, it will decrease the spiciness of the chilli as Indonesian chillies are really hit. Once you put the sugar in, you have to work quickly as the sugar will burned off and made the chilli mixture darken in colour.
- Store them in an airtight container to retain freshness, in case you have any leftover.
read more…
I did orange cupcakes before and posted in October archives, however this time I followed the original recipe all the way through except for the vanilla beans and the type of sugar (this one accidentally …ooppssss). I almost panicked because of using the normal white sugar instead of caster sugar. I can hear the sound of sugar while they were being beat together with butter, and finally I gave up trying to smooth them after 15 minutes and continued with the next step. FYI, I made three batches of the recipes in one go, so it was making me nervous that the cupcakes would fail. It was 11 at night and I was intended to give the cupcakes to my neighbor’s daughter second birthday party the morning after. Thank God the cupcakes turned out just fine.
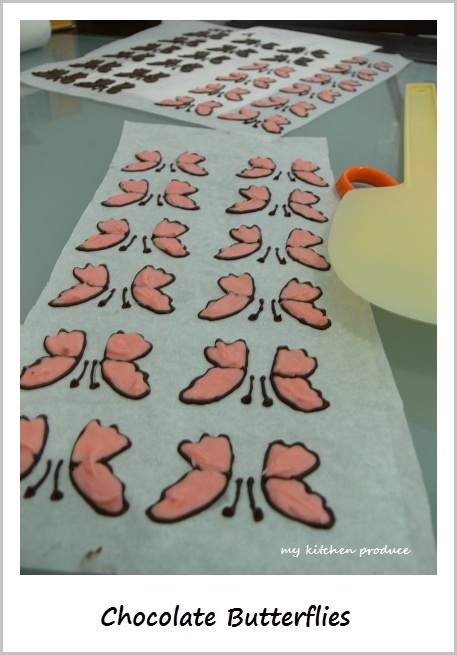
I was researching for so many cupcakes decorations and alternatives. I was thinking of making elmo’s and cookie monster’s cupcake. However, I am afraid that the frosting would taste so chemically because of excessive using of food coloring. So I decided to make butterfly decoration instead. Actually it is easier to use royal icing in making those butterflies, but I try to make my cupcake kid’s friendly, that was the reason why I use dark chocolate and white chocolate tinted pink.
I found so many difficulty in making these butterflies:
- The antennas are completely useless. They were too fragile despite of sticking them together by using melted chocolate. It is better off to draw the antennas using melted chocolate after you finish combining both of butterfly wings. However, drawing the antennas mean that you don’t get the three dimensional effect. Oh well… nobody noticed the antennas in the party

- The white chocolate is really hard to work with. They need to be stirred all the time and you can’t left them or do it in the microwave like the dark chocolate. When they are melted and combined together with the coloring, do not over mix them or otherwise the white chocolate will be ruined and too thick to work with.
- The white chocolate doesn’t seem to be harden at the room temperature, so I need to put them in the freezer for 5 minutes or so. However, you need to work quickly as they are fragile and prone to heat.
Next time, I will just do all of the butterflies wings with the dark chocolate and add some dots as the pattern on the wings.
read more…
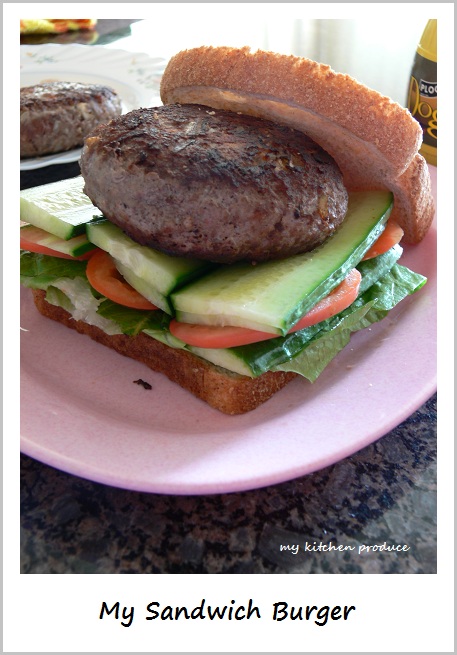
This is one of my quick and healthy sandwich for lunch. It is simple, easy and convenience, especially if you have a little one around the house.
You could add grated vegetable like carrot or zucchini in the mince mixture or some chopped mushrooms is great as well for those extra flavor. I don’t have all those ingredients handy in my fridge, so I mix everything I had.
My little tips to retain your burger patties shape are:
- Try to squeeze the mince mixture gently while shaping them. Patting both sides with palm of your hands could help as well.
- Refrigerate the burger patties in the fridge for at least half an hour before cooking them, so that they could sit for a while.
- When cooking the patties, do not do so many toss and turn. Let them cook at least 5 minutes on each sides. When they are more sturdy, you could then turning them on the other side.
- When making a thicker burger patties like mine, just keep in mind that the inside of the patties might still be medium rare. You could bake them in the oven for a while to make sure it is well done.
read more…
I made this cake last year for my husband birthday, so my memory is kinda blur on how the baking process was going. Sorry I couldn’t share little important details to help you baking this cake. However, as far as I remember this cake was really easy to bake and there is a very little chance that you fail in baking this cake.
The only thing that I could remember is how to make a dressed up strawberry. Here’s how:
- Wash the strawberries and patted dry with paper towel.
- Melt the white chocolate and dark chocolate separately. Fill saucepan with water and let it simmers. Using a bowl that could fit snuggly in a saucepan (make sure that the water doesn’t reach the bowl), stir in chocolate buttons or chopped chocolate chunks. Stir it using metal spoon. Avoid wooden or plastic spoons – these retain moisture that makes chocolate seize (harden).
- Dip the strawberries into white chocolate and set aside to cool. Sometimes it is hard to cool and dry the white chocolate. You could place them in the freezer for 1-2 minutes until they hardened.
- Then dip strawberries sideways diagonally on both sides until you achieved like so in the pictures.
- Using a toothpick, draw a bow and buttons on them.
Because of the copyright infringement thing, I am afraid I could not post the recipe in my blog, however you could get the recipe from here. There are lots of tips and feed backs that could help you. Good Luck !
Please leave your comment/suggestion if you find this recipe useful. Can’t wait to hear from you and Thank You!!
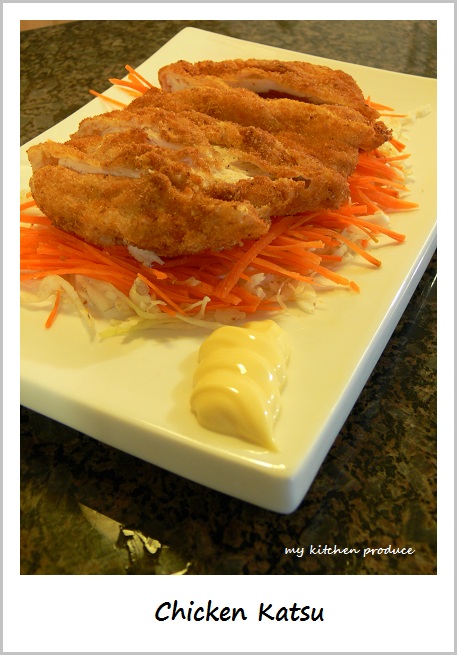
This is one of the easiest and quick dinner meal to serve. Just need to slice, season, dip, coat and fry, and they are ready to be served. If you prefer the healthier version, simply bake them in the oven instead of frying. However, every fried stuffs taste so much better than baked ones ![]()
If you notice the way I double coat the chicken in flour and egg, it is just the way I prefer them to be. However you could just do them once each. There was a story though behind all the double coated and double dipped. I and my mum were running the catering business before. In order to get more chicken katsu pieces, we double coated and double dipped everything, so that the chicken katsu also looks thicker in appearance ;p It was all “business trick”. However, the habit still lives on.
 read more…
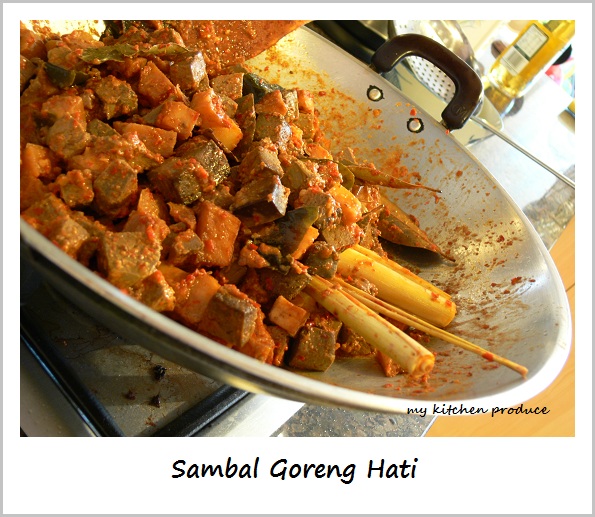
Sambal (chilli paste) Goreng (fried) Hati (liver) is one of complimentary dish to accompany Nasi (rice) Kuning (yellow). I will have have Nasi Kuning and its all common complimentary dishes posted as soon as I have time to do them all at once, so I could have fun in decorating them with banana leaves.
To be honest, I am never a big fan of liver, heart, intestine and other weird organs which are turned into delicacy dishes. I can’t seem to enjoy their “unique” taste. On the contrary, my husband loves them to death that he could eat them almost everyday. So, this dish was cooked on his request.
Usually I use chicken liver instead of beef, because I never eat the beef version before and never cook with it. Few months ago, I tried to cook them to make a beef liver sweet soy version (usually I use pork liver), but instead boiling them in water, I fried them like I treat the chicken and pork liver. They turned as hard as rock. Then, I read on several websites that you have to boil to tenderize them, so I am willing to give it another go. Since the beef liver is cheap and affordable (and FYI, they are considered as pet’s food), I have no hesitations in trying them again.
read more…
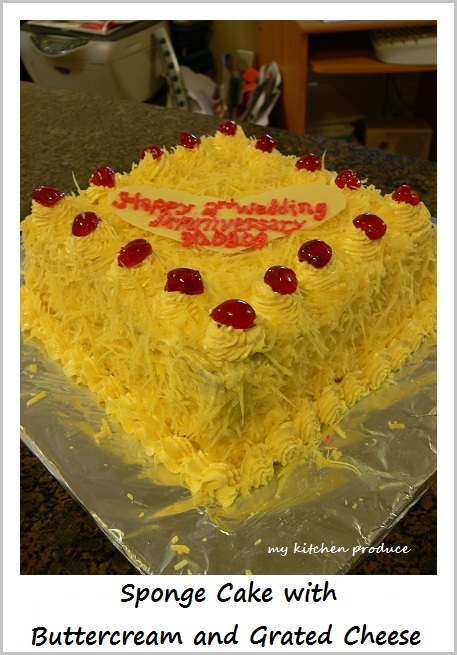
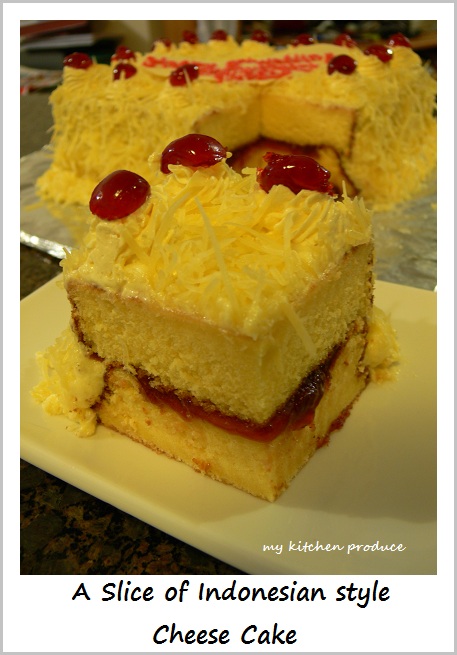
This is what we call Bolu (sponge cake) Keju (cheese) in Indonesia. It is not the usual cheese cake which contains cheese inside the ingredients of the cake but the cheese is grated on top of the sponge cake to cover the butter cream. I still remember that this was the cake I usually favored to buy when I was small, every time we went to the bakery. I just realized that the only cheese that Indonesians have an access before is only cheddar cheese manufactured by Kraft. However, when I went back home I noticed that the supermarket have some varieties of cheeses especially the high end grocery stores. Apart from those varieties, everyday people still think cheese as the Kraft cheddar cheese. I remembered sending a cheese cookies recipe (called Kastengel) using an edam cheese to my mom, however she still used the kraft cheddar cheese and told me that the Kastengel tasted just fine with those cheddar.
This recipe was sent by my friend which she found on multiply (http://parmanti.multiply.com/journal/item/11/Cake_Keju). She is planning to make this cake for her daughter’s birthday parties. So we actually made the cake at her place. Long story short, we were too excited in making cake together for the first time, so with lots of chit chat and laughter, we accidentally throwing egg yolk in the bin instead of putting it to the mixture, forgetting the emulsifier, overflowing the ‘most big bowl’ that she has ;p with the beaten egg mixture and almost broke the mixer because of overusing it.
Drum roll pleaseeeee… and the verdicts from the judges are:
- The recipe is great, genuine, easy and simple to follow. This is a keeper.
- Do not forget the emulsifier, because it is able to make the cake spongy and springy.
- The cake itself is pretty sweet, especially for the little ones. So, need to reduce the amount of sugar.
- Need to reduce the amount of sugar for butter cream too.
- Use grated cheese to make butter cream instead of cream cheese, because cream cheese couldn’t hold its shape while being pipe for a long time.
So, I made the cake for the second time at home with little changes to the recipes. Now, the cake tastes great, except the bottom layer. If you look at the second picture, you could see that the bottom layer has a slight curve on the side, and it is all thank you to my ignorance. I was not preheat the oven long enough and the oven is not ready to bake my cake, so there you go. After I took the tin out of the oven, I could see that the cake was actually shrinking ![]() Thank God the top layer is perfect.
Thank God the top layer is perfect.
Probably you notice I had some writing written on top saying: “Happy 3rd Wedding Anniversary 30.09.09″ I know.. I know.. it was a month ago. Here is my excuse, I made Opera Cake on the 27th September for my brother in law graduation, so if I make another one, we would be too sick of eating too much cakes.
Here is its up close appearance. See the curvy bottom layer… what a disappointment ![]() and ruining a perfect cheesy looking cake.
and ruining a perfect cheesy looking cake.
read more…
There is always that day where I can’t resist to bake or try to bake something new, and there it was a cupcake day. I chose cupcakes simply because they were quick and easy to make, and I couldn’t do something complicated with my toddler running around the apartment. He will keep bugging me for attention once a while or worst he could force me to play with him. So, there you go, you could see his blurry face on the background of cupcakes because he could not wait to have some. He eyed on a particular cupcake.
What I love about this particular cupcake is that I don’t need to use a mixer, which means less things to be wash in the sink (that is the important thing.. right??). I got pretty good reviews from all the cupcake eaters especially about the crunchy top bits. So, here are some tips before you start the cupcakes because I almost ruin this easy cupcake because of my laziness (*wink*):
- I always melt dark cooking chocolate in the microwave although the recipe requested a double boiler. Anyway, I waited for the chocolate mixture to be quite cool, then I add the sugar in. Then I realized that the sugar is not dissolving (%*&#!). I should add icing sugar or caster sugar instead of ordinary sugar. I kept whisking and whisking and whisking, it won’t budge. I boiled hot water quickly then pour it in the pot, so I could place my bowl over that. … keep whisking and whisking (and thinking to myself “Did I just turn the melted butter into butter again?). Oh what the hell.. I just add eggs and continue with another steps. Thank God my chocolate cupcakes turned alright.
- The chocolate cupcake took longer time to cook than I expected. When the skewer is inserted, it was clean except the top part layer (about 2mm). I guess all the undissolved sugar went up and that made it caramelized and crunchy when eaten.
- I used 250 gr of cream cheese not because I thought that the frosting is not enough for the cupcakes but because that is how much they are come in a packet. Next time, I will double the cupcake recipe for those 250 gr cream cheese.
Here is how the chocolate cupcake looks up close and personal ![]()
read more…
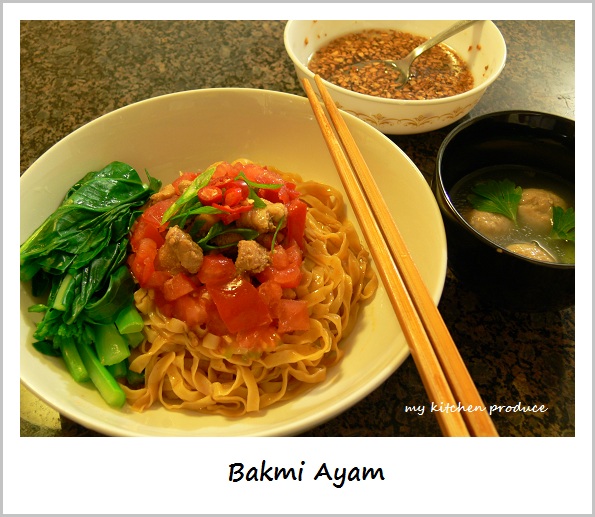
I was looking forward to a new dinner menu and Bakmi Ayam came across my mind. I was thinking about my favorite noodle dish near chinatown called ‘Bakmi Gila’ (which means crazy noodle). I guess they named the noodle Bakmi Gila is because the chilli sauce mix in the noodle is really spicy, that people usually say ‘Gila… the noodle is really hot’. For those people who know this dish and crazy about it, I tell you now that my ‘Bakmi Ayam’ doesn’t even taste close to that Bakmi Gila. So don’t put your expectation to high on mine (*wink*)
It was weekend and I was very excited to do my groceries shopping for this menu. Oh my…. what a bad weather that Sydney had. So we drove to the city instead of walking, as what we usually do in the weekend. As usual, there must be something that I forgot to buy, and this time it was chillies. I need these chillies to be pureed so I could make the Gila Sauce. So there you goes, my ‘imitation Bakmi Gila’ turns into ‘ordinary Bakmi Ayam’. (Next time I will post my trial recipe on my imitation Bakmi Gila and let you guys who tasted the real one and tried my recipe be the juries)
read more…
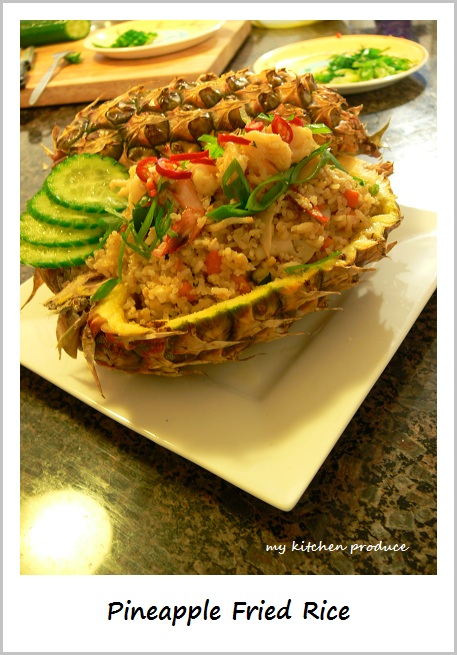
Fried Rice or what we usually called Nasi (Rice) Goreng (Fried) in Indonesia could be cooked in so many different ways. You could add absolutely anything that you love in it and let your creativity goes wild. Fried Rice is best cooked using cooked overnight rice that you store in the fridge, that is why Indonesian cooks them using leftover rice from dinner for the next morning breakfast.
This is the first time I cooked fried rice using pineapple. I like to try something new and it was exciting especially the decorating part. Few things that I could do better next time I cook Pineapple Fried rice are:
- When you buy pineapple, make sure that you just store them for 2 days top. Mine became so sweet after 5 days and it was so good to eat the pineapple by itself that I feel sorry for pineapple to be put in the fried rice
 I guess it is nice to have a slightly sour pineapple so that the fried rice would have those tangy taste. rather than just sweet.
 - When you cut your pineapple open, make sure that the pineapple pieces that you want to add later on to the fried rice are placed on the strainer, so that they don’t turn your fried rice soggy.
- The pineapple shells should be placed like a dome shape, so that all the juices are drained.
- This is ‘a must do thing’, store your rice at least overnight on the fridge. I will store mine at least 2 or 3 days on the fridge so that the pineapple juice from the pieces will not affect my fried rice.
