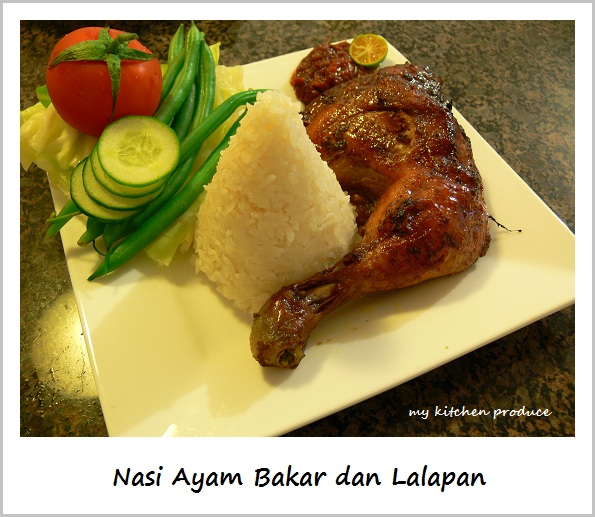
This is a standard grilled chicken that you could find mostly in Indonesian restaurants. The chicken is cooked for a very long time so that the flesh is really tender and almost melt in your mouth and the bone is quite soft. You could also deep fry this chicken instead of grilling them and you could literally eat the bone. It is usually served with nasi uduk, lalapan (steamed or raw vegetables) and sambal cobek or terasi (but mine is only served with steam rice).
I found that this chicken dish is pretty convenient to make because I could store them in the fridge for few days in an airtight container after being cooked. Then, I just grilled or deep fry them every time I have no time to prepare dinner. It is easy peasy and quick meal to serve and my whole family loves it.
My tip before you start cooking this is that do not try to stir or move the chicken while being cooked, because the chicken could become very soft and fragile and it will lose its shape. Just let it simmer for at least one hour and turn your heat off afterward, and it is ready to be stored, grilled or deep fried.
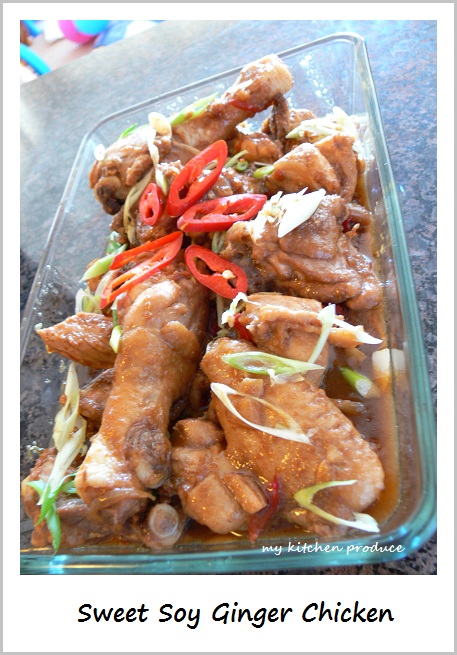
I posted the same sweet soy ginger recipe using pork rashers, but this time I used chicken instead (going for much more healthy and less fatty stuff). This is an easy quick recipe and has been in our big family’s favorite dinner menu for a long time and now I am bringing this menu to my little family for the first time. The verdict from my little family in Sydney is loving it and can’t get enough of it, especially from my little one who loves eating sweet and spicy meals.
Before you start, here are my tips to achieve a perfect Sweet Soy Ginger Chicken:
- Make sure that you cut the chicken into small pieces, so that the juice is easy to be absorbed and the spicy ginger flavour is intense.
- My measurement of sweet soy sauce and water is an approximate, so you could adjust accordingly to suit your taste, as I didn’t really measure when I cook (ooopsss sorry)
- Don’t turn the chicken cutlets too often while they are being cooked as you could ruin the chicken.
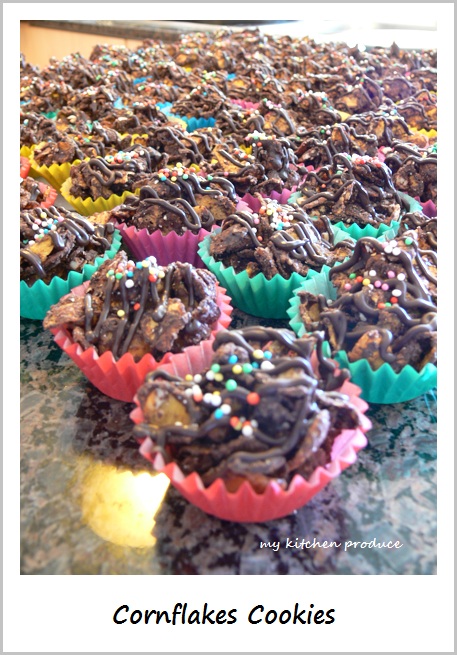
Cornflakes Cookies is one of the usual cookies served during the season of festivities such as Idul Fitri, Christmas and Chinese New Year in Indonesia. It is really simple to make and always becomes a crowd favourite.
I used to make this back in Indonesia using Kellogs Corflakes. However, I just realized that the cornflakes sold in Australia is so much thinner and crispier, which made me ending up with adding another 250 gr of melted dark cooking chocolate. That amount was not enough and I have to bind them together again with a drizzle of dark cooking chocolate after they were placed in the cupcake liners. My husband said that the one in Australia tastes better than the Indonesian one, because the chocolate is more and the cornflake is crispier.
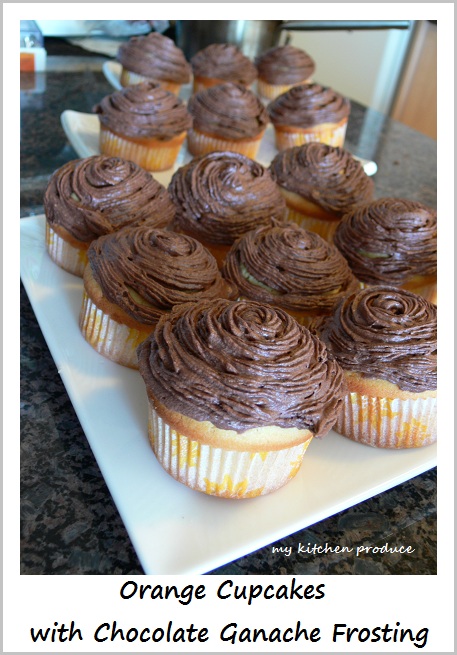
I have a huge amount of whipped chocolate ganache left over from the Opera Cake and feel pity if I don’t use it for something else. I don’t want to make another cake as no one will able to finish the Opera Cake and the new cake, so I chose to make a simple cupcake, which I never bake before. I was really excited because this is my first cupcake ever.
I came across this fabulous website and all about cupcakes (http://iheartcuppycakes.com/2009/09/20/orange-creamsicle-cupcakes/) and decided to try the Orange cupcakes. I was worried when I saw how thick the batter turned out and afraid that it would have a hardened base, or what I called ‘Bantat’ in Indonesia. How surprised and pleased I was to find that the Orange cupcakes tastes amazing, they are fluffy, light, soft and refreshing. Next time I will try the Orange fosting as suggested in the recipe and post the result as soon as I find out the outcome.
This is one of my trial cake as I like to bake a new cake recipe. I found this cake quite interesting because the ingredients contain almond meal, as I never bake with it before. I was worried when I mix the almond meal into the cake mixture that I would weigh down the batter because of its heaviness, as the cake batters has to take turn to be bake in the oven. It didn’t collapse but it might be because it didn’t take that long to bake the cake. Just to be safe, next time I will mix the almond meal just before each cake layer is going to be bake.
There are few errors when I bake the cake as I usually did with my new found recipe ;p The recipe stated that the cake should be bake with a 30×30 cm square tin, however I found that the cake mixture doesn’t really enough for 3 layers of 30×30 cm cake, but it was too little too late. So what I did was cutting a two layer 30×30 cm cake in half and have a 4 layers 15×30 cm cake. Oh well, it still looks great.
I still wonder though why the coffee mixture uses half liter of hot water, which is a bit too much for me or probably I wouldn’t dare to take risk to pour all of the liquid onto the cake. Next time I will make 250 ml instead and pour all of them, as I found the cake a bit dry. I probably only poured 125 ml to the cake and try to drink some of the liquid by adding ice cubes and ending up with throwing the left over liquid into the sink.
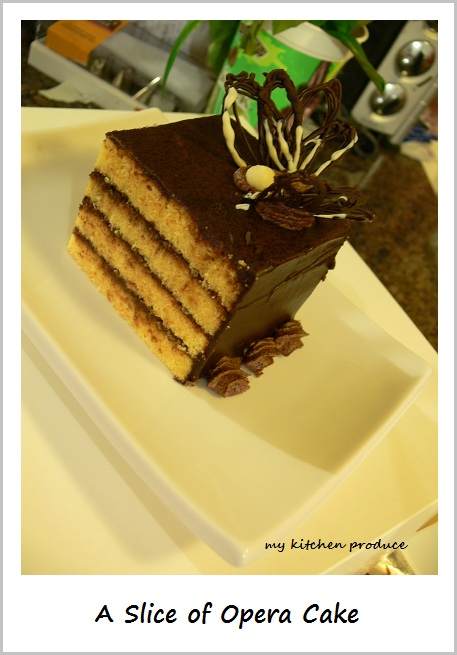
I usually waiting for an occasion to happen in order to bake a cake, and now its my brother in law’s turn. This cake is to celebrate his master graduation ceremony. I decorate the cake with chocolate butterflies, which previously wasn’t intended to be a butterfly. When I start to put them together, it forms a butterfly shape, oh what the heck I just make them to be one. And there they were 8 butterflies, which were a bit too crowded for the cake, and I blame it to the previous stated recipe that is to bake them on 30×30 cm square tin. It is nice to the fact that I am able to blame it on something … and not myself ;p

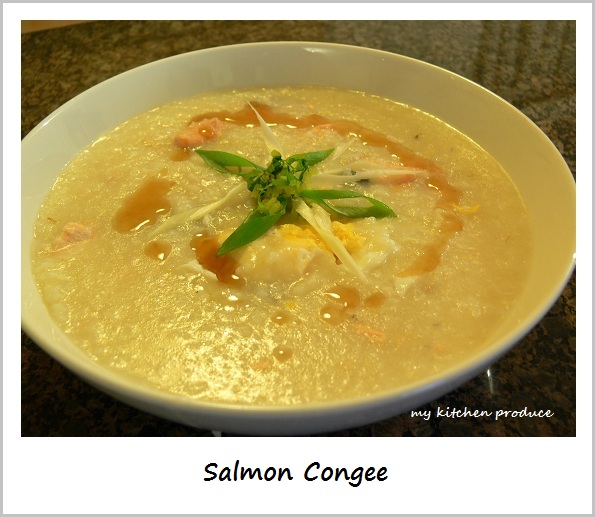
This is the easiest and un-hassling food to have for dinner. Just remember to eat more than your usual portion as it is very liquidity, and you are good  You could use absolutely anything to make a congee, from fish, egg, liver to chicken, beef or pork. It is all depending on your appetite.
I remember when I was little I used to watch those sad Chinese films where the family is really poor and don’t have food enough to feed the whole family, so the mother cook congee instead of rice so that the whole family could have dinner. Anyway, I cook congee not because I don’t have enough rice to cook for dinner, but because my husband loves eating salmon congee accompanied with original crinkles cut chips, and it has been a long time since he had his last one.
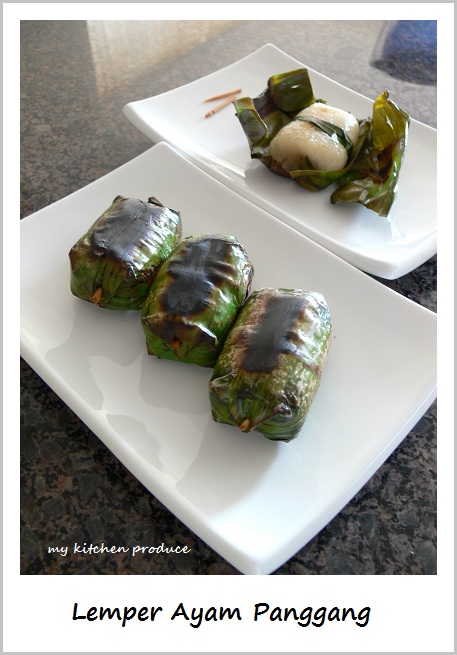
Lemper is like an Indonesian sushi. It is made from a sticky glutinous rice filled with kencur chicken and wrapped in banana leaves. The way Indonesian people eat it is by grilling/burning the banana leaves wrapping so that the fragrance of the leaves could be absorbed into the sticky rice. Lemper is one of the most popular ‘Jajanan Pasar’ in Indonesia. Jajanan means food and Pasar means traditional market.
The most important ingredients of Lemper are garlic puree and kencur. Fresh kencur is impossible to find in Sydney market. Thank God for a commercial bottle Kencur sold in Indonesia groceries store. However, fresh baby celery is not less important than Kencur. How lucky I am to find fresh baby celery in Thai grocery store just when I thought of making Lemper. That was the first time ever I saw those baby celery in Sydney. This baby celery is different from the usual celery. They look more like coriander but the smell is not as strong and smelly (no offense to Coriander lover.. but I couldn’t stand the smell).
This is the second time I made Lemper Ayam and the taste and appearance is much better than the first. Gosh I still remember how I screwed the large order of 250 pcs Lemper Ayam together with 1000 pcs of Klepon. The Klepon was excellence as I am used to making so many of them, however the Lemper was a disaster. I hadn’t had a chance to experiment with it and the Lemper order was the last minute thing, and how silly I was to accept the request. My grandmother was supporting me on the phone (while she was in Indonesia) and told me that they are easy-peasy. I am not saying that I shouldn’t listen to her but she was so used to accept a very large order (a very large order that I mean is like 10,000 pcs). I was so inexperienced with the cooking glutinous rice that they were all unevenly cooked and still raw. Since that moment, I was so traumatised with cooking glutinous rice and never want to even try cooking them again, and that was 6 years ago. Last August I succeed cooking Nasi Kuning (Yellow Rice) for my toddler’s second birthday that I regain my confidence and want to have another go.
I was never taught how to cook Lemper step by step, so I just rely on my grandma’s saying and my memory of how it tastes like. As my grandma never measure all the ingredient that she uses in cooking, so she pretty much describes the taste over the phone. I wish I would pay much attention while she was doing the cooking back then, and now I will make myself taking notes while she is cooking when I go back to Indonesia 
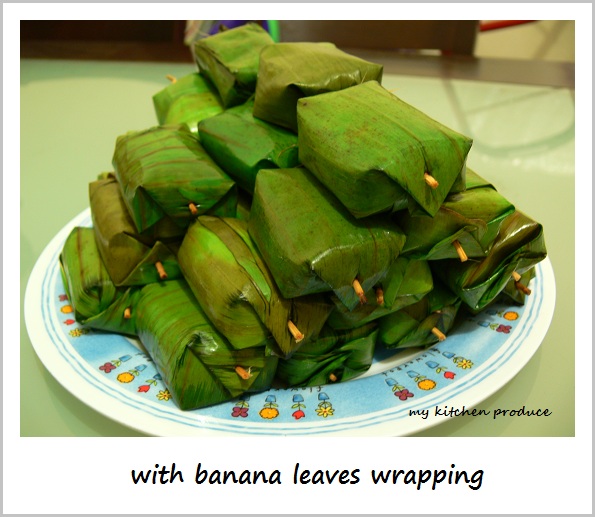
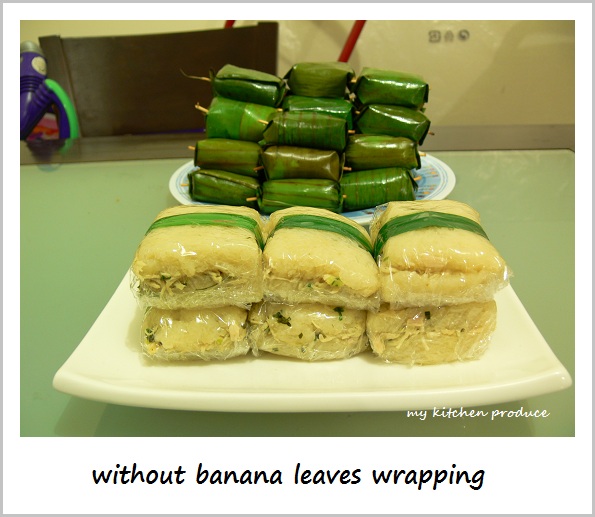
This is how the Lempers look like after being wrap in banana leaves. They are ready to be packed in a container so I could store them in the fridge.
I was running out of banana leaves so what I did was laying a layer of sticky rice in a rectangular glassware (about 1 cm in thickness), then spreading the filling on half top of sticky rice, so that I could fold them like making a sandwich. Then I cut and wrapped them using plastic wrap, so the surface wouldn’t harden as they are exposed to the air.
 read more…
Lapis Surabaya is a three layered cake with a mocha/chocolate middle layer and stacked together with a strawberry jam or butter cream filling in between. I know what you all thinking, Oh God… look how many egg yolks are used for this cake. Wait till you hear Lapis Legit (multi-layered cake) that use 40 egg yolks. It is just like walking one step closer to the heart attack every time you bite them. However it is really worth to try though. Just don’t eat them to often.
Lapis Surabaya is a tricky cake for me to bake. When I first tried to bake it with my old oven few years ago, I couldn’t even start to tell you how many failures I had. The cake always looked nice while still being bake in the oven, and would collapsed or had like a concave uneven surface after you took them out of the oven. I had so many heartbreaks and failures but I eventually managed to receive some orders from my loyal customers. They didn’t even care about the surface as this cake taste great. I figure the oven here somehow has different heat circulation or some sort in comparison to the one used for baking in Indonesia. I know people use to bake with charcoal heat oven traditionally and now they have a big upgrade oven with gas.
Anyway, I never feel discourage to bake them over and over again. Every time I know that one of my relatives have a birthday coming up, I usually give them the cake so I could practice to play with my oven heat, setting and temperature. And this time, the cake is for my auntie (from my husband’s side actually). I should say that this cake is still not that perfect. There are still few improvements that I would do next time I bake them. I guess the oven need to be really hot before the cake is bake, but I was just to worry that it would speed up the browning over the top of the cake before the cake is cooked. Another thing is that my temperature is a little bit too low, so next time I would bake them at 190 or 200 C. You need to adjust according to your oven though as the heat in every ovens vary.
For the butter cream, I usually used the one with sugar cane syrup, but it is too much hassle as I need to steam the rock sugar which took me ages. So I found this great website about cupcakes and various frosting and decided to try the Meringue Butter Cream as I have an unlimited access to egg whites. So here is the link if you would like to know how exactly the butter cream done step by step (http://iheartcuppycakes.com/2009/06/30/practically-perfect-party-cupcake-in-every-way/)
I found that this Meringue Butter Cream tastes great and easy to work with. The only thing I learn is that to put enough butter cream about 5 minutes worth of piping in your bag, or otherwise it would melt and turn watery. You could see the evidence from my rose buds. They have a thick and bulky petals as I would like mine to look more crisp and pointy. Next time I will try royal icing for the roses, but the Meringue Butter Cream recipe is definitely a keeper.
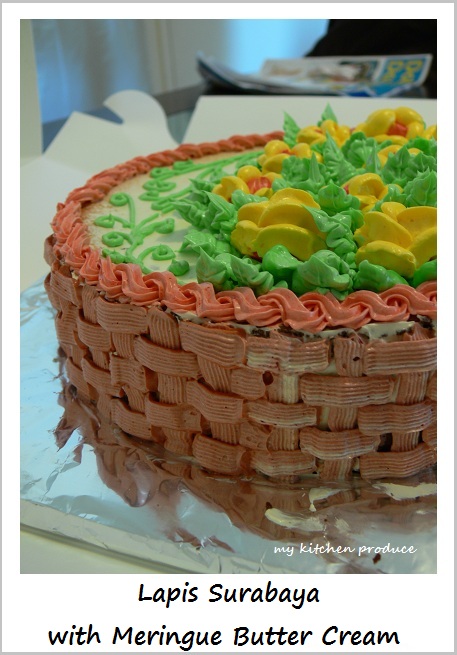
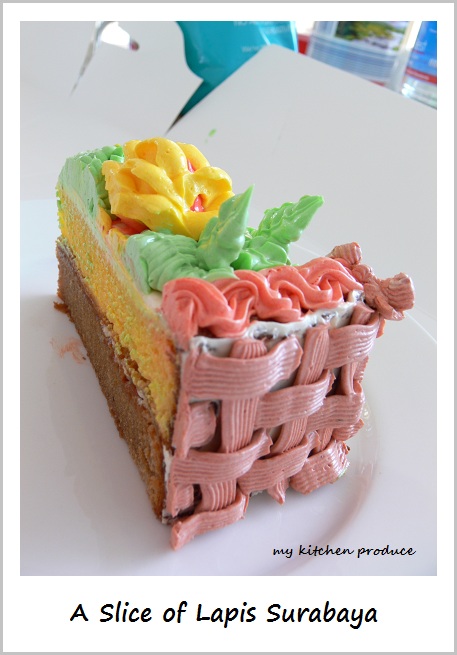
Here is the cake with the candle on, followed by a slice of Lapis Surabaya before it went in to my tummy 

I always have a huge stock of egg whites left over after finishing my cake order of Lapis Legit to my customer during Lebaran Idul Fitri, Christmas, New Year, and Chinese New year. Sometimes I just won’t bother of storing them in the fridge and they just went straight to my kitchen sink. This time I rescue some so I could try few new recipes of cakes and savories varietes.
A lot of things you could do with egg whites. You could make pavlova, cakes, as a coating to your meat before crumbing them, steam them or put them in a heatproof plastic and boil them and they look and taste like a fake silken tofu. You could even put them on your face as a mask, which some people said that it could tighten your skin.
I got this recipe from my short baking course’s teacher in Indonesia. However I altered the recipe to suit my pantry baking stocks and thank God I succeed. Usually cake with egg whites ingredient or chiffon cake could be pretty tricky, but I guess that was my lucky day.
Few tips before you try this recipe:
- Make sure the container you use to whip the egg whites is absolutely fat and oil free.
- Egg whites should be in room temperature.

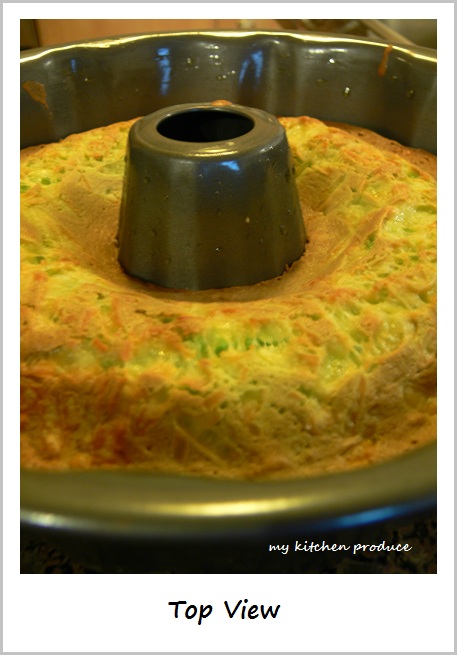
Here is some photos I took before we ate them
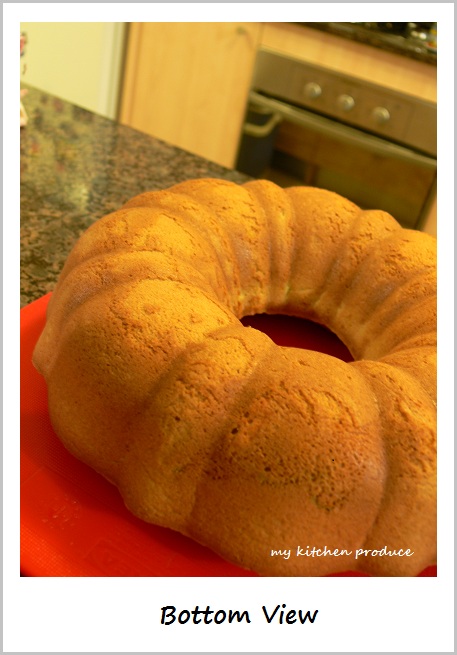 New Update:
I tried this recipe again because I have a huge stock of egg whites. I baked it with different ingredients from the first one. This time I used icing mixture instead of caster sugar, turned out the cake is so much sweeter, so I recommend to decrease the amount of sugar into 125-150 gr. Another thing was that I used emulsifier and the cake is fluffy, spongy and soft, in comparison to the previous one.
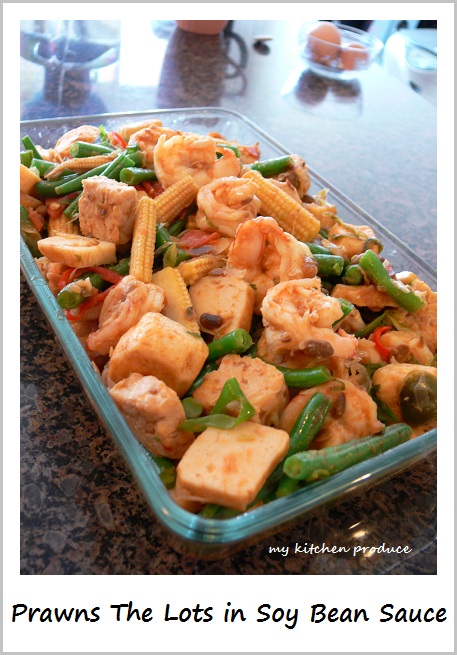
We have been having a lot of chickens in our menu for almost everyday of the week. Although none of my family members are complaining, at least not that I heard of, I am sick of cooking with the same ingredients over and over. I need new ingredients and taste so bad that I went shopping with nothing on my list. HOORAAYY!!! I past the seafood shop and their local Australian banana prawns are on special for $12.90/kg. How good is that price for a genuine family feast. I then when to buy something that might goes well with prawns, those are baby corns, tempe, and fish tofu. For your information, I bought the tempe and fish tofu from Asian supermarket and the tempe has a pale color compare to the one that sold in Coles or Wollies.
My family loves this dish so much that I cooked this dish twice already for this week. I know what you all are thinking… so much for cooking the same ingredients over and over again. What I love about this dish is that i don’t have to cook the vegetable dish to accompany them. How good is that huh.. just cooking once and you got everything come in one dish; prawn, soy, and vegetables.
A little tips from me though before you start cooking this:
- You could deep fry the tempe because the un-fried tempe will thicken the sauce slightly. Of course they taste so much better because of the frying process, but I try to avoid as much deep frying as possible

- Remember to add the salt and sugar later after the salted soy bean sauce because the sauce is really salty. I once did a stir fry Kang Kung (water spinach) with salted soy bean sauce and it was extremely salty that I have to eat them little by little with lots of steam rice.
- Add your beans just minutes before you turn off the stove to have those yummy vegetables crunchiness.
- You could also add silken tofu (coat them with corn flour and deep fry until slightly yellowish brown) or your favorite vegetables.
I got the recipe from my sister in law who got this recipe from her friend who got her recipe from her other friend. So I am not really sure who actually invent the recipe and it is kind of difficult to trace who this recipe belongs to. Anyway, the Fried Chicken really tastes great, crunchy and garlicky.
She told me the recipe over the phone, so I was not really sure about the batter consistency, but I made it anyway. The first time I made this, I completely turned them into other form of fried chicken. I added a little bit of water because when I tried to mix the batter with chicken cutlets, the batter seems too thick and it didn’t coat the chicken surface evenly. So, the Fried Chicken only stayed crunchy just for a little while. The second mistake I did was mincing the garlic instead of pureeing them. That was a big ‘NO-NO’, the garlic mince fell apart from the chicken and float on the oil. So, by the time I deep fried the second or third batches, there were lots of burned black overcooked garlic floating on the surface of the oil. Therefore I need to keep separating them from the oil, which were a lot of hard work.
My sister in law told me that the ratio between the plain flour and the rice flour is 1:2. However, as usual I like to experiment as I cook the dishes over and over again. I changed the ratio to 1:3 because the rice flour help to increase the crunchiness of the Fried Chicken. The batter will be really thick when you mix them together and they may seems like they don’t coat the chicken evenly, but they do. Just remember to keep coating them before you deep frying them into the oil. The batter will be slightly thinner eventually as your raw chicken will release its juice.


